Each time you publish a new post, your subscribers receive an update via email, in their Reader, or both depending on their settings. This guide will explain how to manage your site’s subscribers.
In this guide
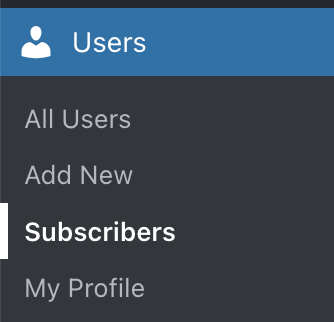
To view your subscribers:
- Visit your site’s dashboard.
- Navigate to Users → Subscribers (or Hosting → Subscribers if using WP-Admin).
Here, you will find a list of people subscribed to your site’s blog posts:

Next to each subscriber, you can identify their Subscription type (free or paid) and the date they subscribed to your site.
Use the options at the top of the Subscribers list to:
- Search your subscribers by name, username, or email.
- Sort your subscriber list by name (alphabetical order) or by most recently subscribed.
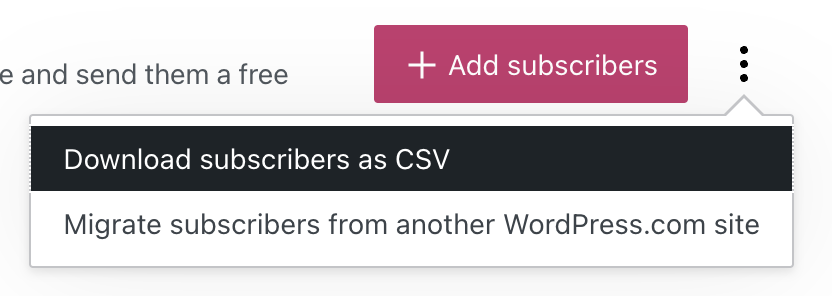
To download a list of all email addresses, click the ellipses (three dots) in the top right corner of the screen, beside the “Add subscribers” button. Click the “Download subscribers as CSV” button to save a CSV file to your computer containing all email addresses. You can then use that file to import your subscribers to another platform like Mailpoet.
To encourage people to subscribe to your posts, you can add a Subscribe block in a prominent position on your site.
You can also manually add subscribers to your site if you know their email address. To add subscribers to your site, take these steps:
- Visit your site’s dashboard.
- Navigate to Users → Subscribers (or Hosting → Subscribers if using WP-Admin).
- Click on the “Add subscribers” button in the top right corner.
- Type the email addresses of your new subscribers in the box provided. After filling in three boxes, additional boxes will appear (up to a maximum of six at a time.)
- Alternatively, click the “upload a CSV file” link to add a large list of subscribers. See Import Subscribers for more.
- Click the “Add subscribers” button to finish.

When you publish a new post, an email is sent to all your email subscribers. When you click Publish on a new post, scroll down until you see the number of subscribers the post will be sent to:

WordPress.com will only send out notifications for new public posts. If an email was not sent to your subscribers, possible reasons include:
- You published a different content type, such as a page or a custom post type.
- You updated an already published post. This will not send a notification email.
- If your site is set to private, your subscribers will not receive any email notifications of your posts.
- An email was sent, but your subscriber missed it. Ask them to check spam/ junk folders in their email program.
You can access detailed statistics and insights about your subscribers.
To access detailed information about your site’s subscribers:
- Visit your dashboard.
- Click on Stats (or Jetpack → Stats if using WP-Admin).
- Select the “Subscribers” tab:

The Subscribers screen shows the following information:
- All time stats: The total number of email subscribers, as well as a breakout of how many are free email subscribers vs paid email subscribers.
- Subscribers: This section includes a chart showing subscriber growth over time and a list of subscribers showing when they subscribed.
- Number of Subscribers: The total number of subscribers. If you have connected your social networks to WordPress.com, you will also see your social subscribers count.
- Emails: A list of the latest emails sent from your blog or newsletter with columns for opens and clicks.
You can view stats for individual subscribers by following these steps:
- Visit your dashboard.
- Navigate to Users → Subscribers (or Hosting → Subscribers if using WP-Admin).
- Click on the three horizontal dots in front of a subscriber name.
- Select View.
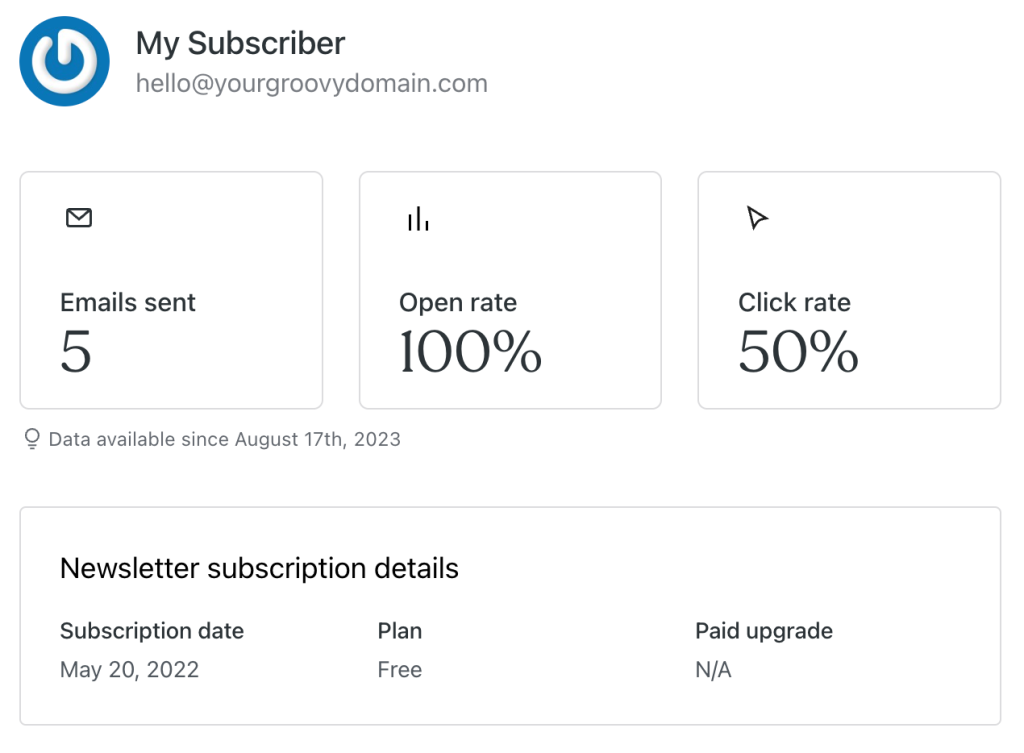
Here, you’ll find the following stats:
- Emails sent: the number of newsletter emails sent to the subscriber.
- Open rate: the number of times they opened a newsletter.
- Click rate: the number of times the subscriber linked on a link the subscriber clicked.
- Newsletter subscription details: subscription details like the Subscription date, Receives Emails For (if “Newsletter Categories” is turned on), Plan, and Paid upgrade, if any.
- Subscriber information: shows the subscriber’s email address and their country.
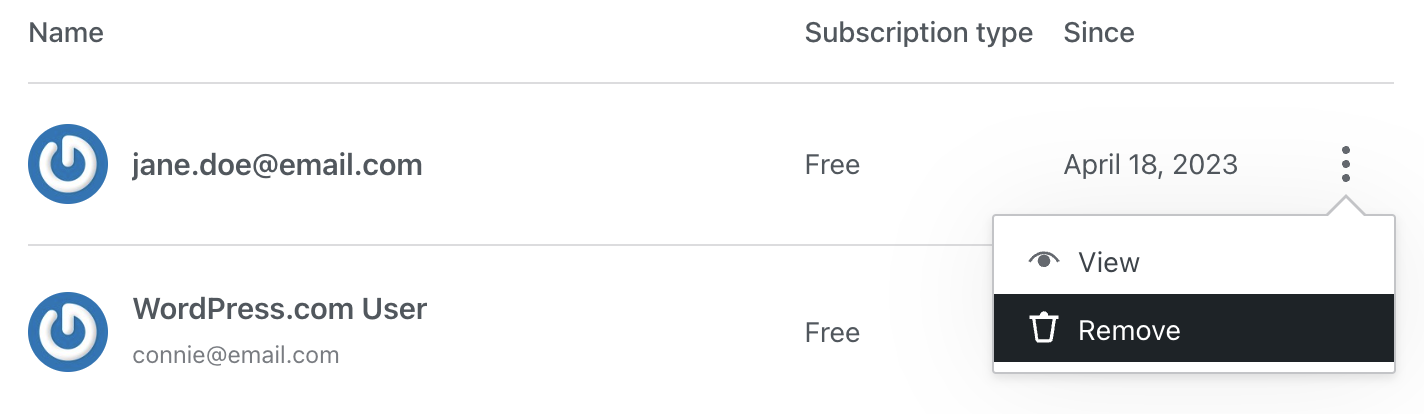
To delete a subscriber:
- Visit your site’s dashboard.
- Navigate to Users → Subscribers (or Hosting → Subscribers if using WP-Admin).
- Click on the three dots next to the subscriber you would like to remove.
- Click the “Remove” button next to their name:
- A popup will appear. Click the “Remove subscriber” button to confirm that you no longer wish this person to receive new notifications from your site.

