This guide will show you how to use the Gallery block to display multiple photos together. The Gallery block contains individual Image blocks for each image and arranges them in an attractive way.
In this guide
To add the Gallery block, click the + Block Inserter icon and search for “gallery”. Select it to add the block to the post or page.
💡
Using your keyboard, you can also type /gallery on a new line and press enter to quickly add a new Gallery block.
For more information, visit our detailed instructions on adding blocks.
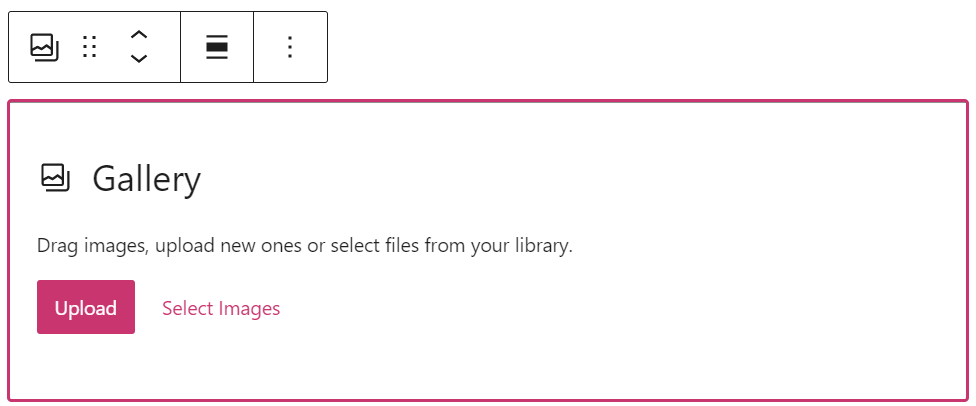
When you add a Gallery block, you’re given two options: Upload and Select Images:
- Upload: Add new images from your computer to your website.
- Select Images: Choose an image from:
- Existing images in your site’s Media.
- Your phone, via the Jetpack Mobile App.
- Your Google Photos account.
- The Pexels Free Photo library.
- The Openverse library of free photos.
If you have already created a gallery and wish to add more images to it, follow these steps:
- Select the Gallery block. Common methods for selecting the Gallery block include:
- Method 1: Click the List View icon and select Gallery from the list.
- Method 2: Click in your gallery in the editor, then select the Gallery block icon in the toolbar above the image.

- Click the Add button in the toolbar above the Gallery block to add more images:

- Add your new images via one of the following options:
- Open Media Library: Add images you have already uploaded.
- Upload: Upload new images from your computer or device.
- Click Update or Save in the top right corner of the editor to save your changes.
To copy or duplicate an image, or remove the image from the Gallery block:
- Select the individual image.
- Click on the three dots on the upper right of the toolbar.
- Select the corresponding action.

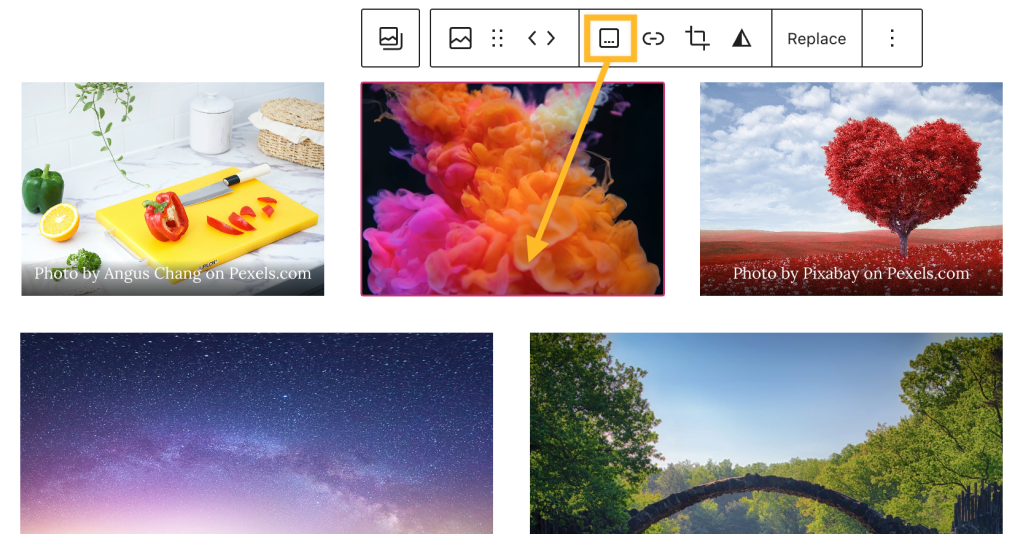
When you click on the block, a toolbar of options will appear:

The Gallery block has the following options in its toolbar:
- Change the gallery to another block, including Image, Slideshow, Tiled Gallery, and other gallery formats.
- Drag the block.
- Move the block up or down.
- Align left, right, or center (and wide and full widths if supported by the theme).
- Add a caption to the overall gallery (you can also add captions to each image).
- Add: add more images.
- More options.
When you select a block, you will find additional block settings in the right sidebar. If you do not see the sidebar, you may need to click the Settings icon in the top-right corner to bring up the settings. This icon looks like a square with two uneven columns:
To ensure that you are editing the Block Settings for the Gallery block and not an individual image within the gallery, use one of the following methods to navigate to the Gallery block:
- Method 1: Click the List View icon and select Gallery from the list.
- Method 2: Click in your gallery in the editor, then select the Gallery block icon in the toolbar above the image.
The Gallery block has the following settings:
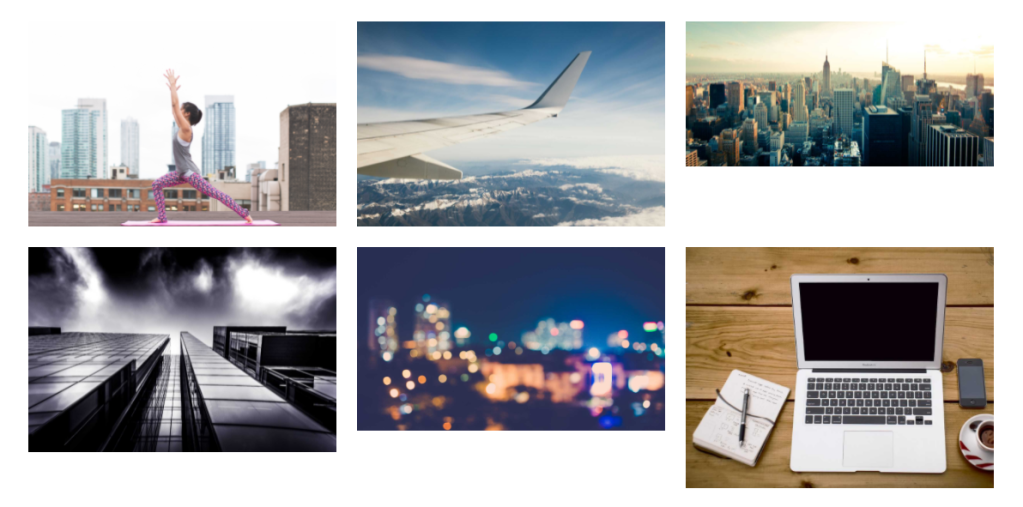
Select between one and eight columns to display your gallery images in multiple columns. Your images will automatically arrange themselves into the best configuration according to the number of columns you select. Try changing the number of columns to see what you like best.
You can only select as many columns as you have images in the gallery. If you add four images to the Gallery block, you’ll be given the option for a maximum of four columns. The number of columns you can add will increase as you add more images until you reach the maximum of eight columns.
You can select whether or not you’d like your gallery thumbnails to be cropped. Cropping the thumbnails is useful if you have images of varying sizes and shapes, but want them to appear all in the same size. The size and dimensions of the original image in the gallery will not be impacted.

If you want the images the gallery thumbnails link to to all be the same size, you have two options:
- Use an image editor on your computer to resize all of the images to the same dimensions.
- Use the option in Media to edit the size of the image file.
Toggle the “Random Order” option so your visitors see the images in your gallery randomly when they visit the site. Alternatively, leave this option toggled off if you want to set the order of your images.
In the Gallery block settings, there are three options for linking the gallery, explained below. If the Image Gallery Carousel is enabled on your site, clicking on the gallery will open an interactive slideshow/lightbox instead of using the link settings.
After disabling the carousel, you can set the following link behaviors on the Gallery block:
- Attachment Page: This will lead anyone who clicks on your image to your site’s attachment page. This is an informational page about your image, which includes the image, the caption, the image description, and a comment field.
- Media File: This loads the images in a full-screen carousel, which your visitors can go through one image at a time. View Media Settings to adjust the carousel settings.
- None (default): This makes your images unclickable, so they don’t link to anything at all.
Alternatively, you can link individual images in the gallery to different pages, following these steps:
- Click on the image you wish to link.
- In the toolbar above the block, click the link icon (it looks like a link from a chain):

- Paste the URL you wish to link the image to, or use the search box to select a published page on your site.
- Press Enter on your keyboard to confirm the change.
For more on linking individual images, see our Image block guide.
The Gallery block also contains the following settings:
Images appear in the gallery in the order you selected them. There are a couple methods for reordering images in the gallery:
In the Gallery Editor
The first time you add images to your gallery, click Create Gallery. The next page, “Edit Gallery”, is where you can add captions and move the position of the image thumbnails.
You will also see the “Edit Gallery” option when you click Add to add new images to your gallery.
In the Block Editor
To reorder images in the Block Editor, click on any gallery image and use the left/right arrows in the toolbar to swap the images:

Alternatively, you can click on an image and choose the drag option (the icon looks like six dots) from the toolbar to move your image:

You can add a caption to the overall gallery using the caption option in the Gallery block toolbar.
After adding images to your gallery, you can also add captions to each individual image. Click an image in your gallery, and click the caption icon in the toolbar above the image. You can remove captions by clicking the icon again.
You can add styling to an image caption by making it bold, italicized, or adding a link to the text. Additional options like Highlight (for text and background color), underline, and more are located in the “More” section of the caption editor toolbar. Be sure to highlight the text of the caption before applying styling and formatting.

The position of the caption cannot be moved in the Gallery block. As an alternative, you can change the Gallery block to a Columns block using the option in the block toolbar. Then, you can add captions as paragraph text below the image in the column.
If you have written captions for images in the Media Library and then add the Gallery block, the Gallery block will show the captions you wrote. However, if you add captions to the images in the Media library after adding the Gallery block, those captions will not appear in the Gallery block. In that case, you can either type the captions manually on the Gallery block or remove and re-add the block so that it will use the captions from the Media library.

