Use the Query Loop block to display blog posts (or other content types such as pages, testimonials, or projects) anywhere on your site. This block is similar to the Blog Posts block, but with greater flexibility to display your content using many different parameters and visual layouts. This guide will show you how to use it.
The Query Loop block may already be added to your site from when you activated your theme. To add a new Query Loop block, click the + Block Inserter icon and search for “query”. Click it to add the block to the page, post, or template.
💡
Using your keyboard, you can also type /query on a new line and press enter to quickly add a new Query Loop block.
For more information, visit our detailed instructions on adding blocks.
When you add the block for the first time, you can choose from different variations:
- Click the Choose button to browse several designs (called patterns) that will display your existing blog posts in various ways. Click a pattern that you like to add and begin customizing it.
- Click Start blank to choose from the following basic variations:
- Title & Date
- Title & Excerpt
- Title, Date, & Excerpt
- Image, Date, & Title
Whichever pattern or variation you choose at this stage, you can later customize the appearance using the settings described in the rest of this guide.
When you click on the block, a toolbar of options will appear:

The Query Loop block contains the following options in its toolbar:
- Change block type or style.
- Drag the block.
- Move the block up or down.
- Display settings:
- Items per page: Choose how many posts are shown on the page. Displaying more than 100 posts at once could significantly slow down the page’s loading time, so this is limited to a maximum of 100 posts per page.
- Offset: Begin from the first post (0) or skip the first X number of posts.
- Max page to show: If pagination is used, this option specifies the maximum number of pages that can be viewed in total.
- List view: Display one post underneath the other.
- Grid view: Display posts side-by-side in a grid layout.
- More options.
When you select a block, you will find additional block settings in the right sidebar. If you do not see the sidebar, you may need to click the Settings icon in the top-right corner to bring up the settings. This icon looks like a square with two uneven columns:
You can toggle the setting called Inner blocks use content width to the off or on position:
- Off: Blocks inside the Query Loop block will fill the container’s width.
- On: Customize the width and alignment for blocks inside the Query Loop block. Set a custom value for the regular width of the content and another value for blocks set to Wide width. You can also justify the content inside the Query Loop to the page’s left, center, or right.
By toggling on the Inherit query from template option, your content will be displayed using the default options. Turn it off to customize:
- Post type: Choose to display posts, pages, testimonials, portfolio projects, or other custom post types that may be added via plugins (such as products via WooCommerce, for example.)
- Order by: Order your content chronologically or alphabetically.
- Sticky posts: Include or exclude sticky posts, or show only sticky posts.
- Enhanced pagination: Toggle this on to allow navigation between different pages of posts without reloading the whole page.

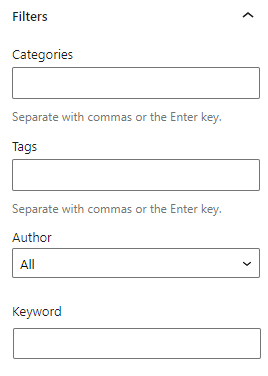
By default, all your post are shown. Using filters, you can narrow down the content displayed using specific criteria. To access the filter options, toggle off the Inherit query from template setting described in the previous section.
Next, click the three dots icon and select which filters you wish to use:
- Taxonomies:
- Authors
- Keyword
Additional filters may be added via plugins (such as product categories via WooCommerce, for example.)
See the Advanced Settings guide for more.
The Query Loop block includes many sub-blocks to give you even more control over how your content is displayed.
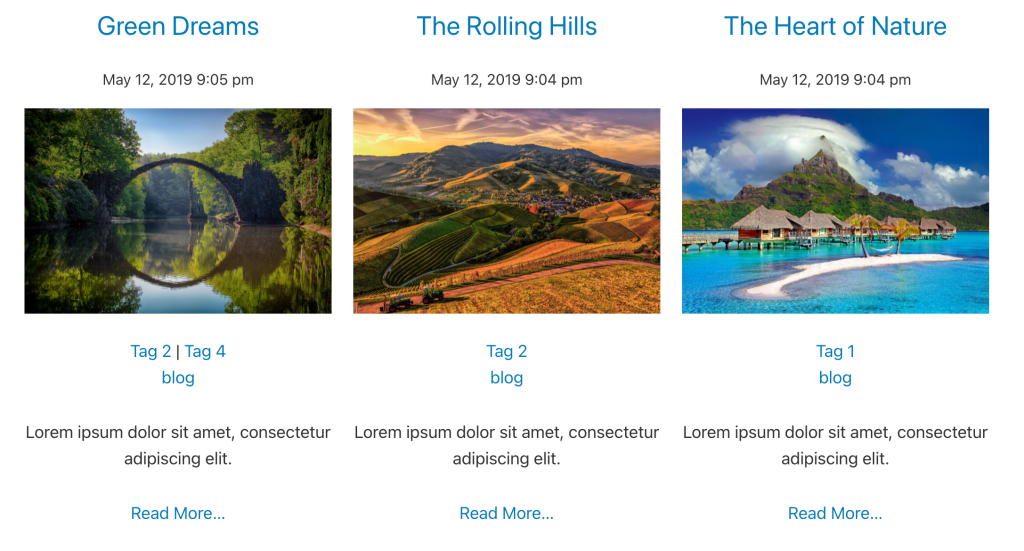
The example image below shows a Query Loop block used to display the Title, Date, Featured Image, Tags, Category, Excerpt, and a Read More button:
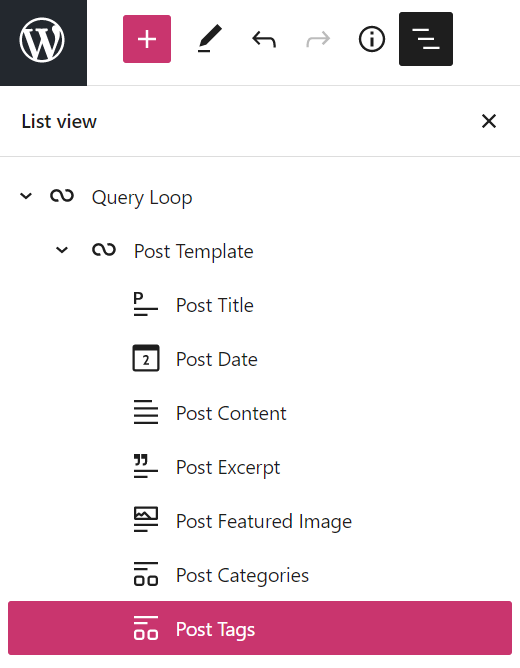
Using List View, you can more easily see the current structure of the blocks inside your Query Loop block. You can use List View to add, move, and remove the blocks as needed.
To view the list of blocks, select List View at the top of your screen. The icon looks like three horizontal lines above each other.
The following blocks can be added inside the Query Loop block. While the blocks are named with the word “post”, they also apply to pages, portfolios, testimonials, and any other content you have chosen to display.
- Title Block
- Date Block
- Modified Date Block
- Content Block
- Excerpt Block
- Featured Image Block
- Categories Block
- Tags Block
- Previous Post and Next Post Block
- Author Block
- Author Biography Block
- No Results Block
Your template may include some or all of these blocks. If any blocks are not included by default, you can add the block inside of the Query Loop block. If you want to remove a specific element from inside of the Query Loop block, you can remove the block. Below, you can read descriptions of each block.
Most blocks contain settings for Color, Typography, Dimensions, and Advanced. Additional settings unique to each block are explained below.
The Title block will display the title of each piece of content you’ve published.
When you click on the block, a toolbar of options will appear:

The Title block has the following options in its toolbar:
- Change block type.
- Drag the block.
- Move the block up or down.
- Align the block content to wide or full width.
- Select the Header size.
- Change text alignment.
- More options.
Link Settings
Enable “Make title a link” if you want the title to link to the content. Optionally, set the link to “Open in new tab”.
The Date block will display the published date of each piece of content.
When you click on the block, a toolbar of options will appear:

The Date block has the following options in its toolbar:
- Change block type.
- Drag the block.
- Move the block up or down.
- Change text alignment.
- More options.
Format Settings
Toggle off the Default format option to customize the way the date appears. Enable Link to post to make the date a clickable link to the post. Optionally, display the date the post was last modified.
The Modified Date block will display the date when a post was last modified or edited. This can be ideal for news articles and other websites to track the latest changes.
When you toggle on the setting to “Display last modified date,” the Date block will convert into a Modified Date block. You can also add this block directly to your Query Loop using the block inserter, and you can display the post’s modified date separately in addition to the post’s published date.
Additionally, the Modified Date block has identical toolbar options and block settings as the Date block.

The Content block is an option if you want to display the entire content of each published post or page within the Query Loop block. You can learn more about the Content block in this guide.
The Excerpt block will display an excerpt for each published piece of content. The “Read More” option will be displayed only if posts include More blocks.
When you click on the block, a toolbar of options will appear:

The Excerpt block has the following options in its toolbar:
- Select the parent Post Template block.
- Change block type.
- Drag the block.
- Move the block up or down.
- Change text alignment.
- More options.
Excerpt Settings
Show link on new line. Enable this toggle to have the “read more” link appear in a new line after the excerpt. Disabling this toggle will place the “read more” link right after the last word in the excerpt.
Max number of words. You can adjust the number of words in the excerpt from the default 55 words to a minimum of 10 words or up to a maximum of 100 words.
You can also modify the default Add “read more” link text by clicking on it at the bottom of the excerpt and typing your custom “read more” prompt.
The Featured Image block will display the featured image you’ve set for your content. Click here for more information on setting a featured image.
When you click on the block, a toolbar of options will appear:

The Featured Image block has the following options in its toolbar:
- Change block type.
- Drag the block.
- Move the block up or down.
- Align the image left, center, right, wide or full width.
- More options.
Link Settings
Toggle the option for linking the image to the published content. This is toggled off by default.
The Categories block will display the categories you’ve assigned to your published content. Click here to learn more about Categories.
When you click on the block, a toolbar of options will appear:

The Categories block has the following options in its toolbar:
- Change block type.
- Drag the block.
- Move the block up or down.
- Change text alignment.
- Change text formatting
- More options.
The Tags block will display the tags you added to your content. Click here to learn more about Tags.
When you click on the block, a toolbar of options will appear:

The Tags block has the following options in its toolbar:
- Change block type.
- Drag the block.
- Move the block up or down.
- Change text alignment.
- Change text formatting.
- More options.
Use the Pagination block to display links to the previous and next posts. The Pagination block consists of three blocks: Previous, Page Numbers, and Next:

To add pagination to a Query Loop block, you must first select the Post Template inside the Query Loop, as shown here:

When you click on the blocks, a toolbar of options will appear with the following options:
- Change block type.
- Drag the block.
- Move the block up or down.
- Align the text left, center, right.
- More options.
In the block settings in the right sidebar, you will find:
- Display the title as a link: With this option enabled, the links will show the post title instead of the words “previous” and “next”. You can also write custom text by typing directly over the words “previous” and “next” in the editor.
- Arrow: Choose to include an arrow or chevron symbol with the pagination link.
Use the Author block to display post author details such as name, avatar, and bio.
When you click on the block, a toolbar of options will appear:

The Author block has the following options in its toolbar:
- Change block type.
- Drag the block.
- Move the block up or down.
- Align the text left, center, right.
- Apply duotone filter to author avatar image.
- More options.
Author Settings
Author selection from drop-down menu, toggle avatar visibility, avatar size, and show or hide author bio.
Use the Author Biography block to display the author biography.
When you click on the block, a toolbar of options will appear:

The Author Biography block has the following options in its toolbar:
- Change block type.
- Drag the block.
- Move the block up or down.
- Align the text left, center, right.
- More options.
The No Results block can be used to add text or blocks that will display when the query returns no results.
When you click on the block, a toolbar of options will appear:

The No Results block has the following options in its toolbar:
- Change block type.
- Drag the block.
- Move the block up or down.
- Align the text left, center, right.
- More options.

